警告
本文最后更新于 2023-01-04,文中内容可能已过时。
pyTelegramBotAPI是用于开发Telegram机器人的Python库,使用简单,上手较快。在这里记录一下pyTelegramBotAPI库的基础用法。
Telegram机器人运行所需的最基本部分为:
1
2
3
|
import telebot
bot = telebot.TeleBot("YOUR_BOT_TOKEN")
bot.infinity_polling()
|
初始化TeleBot对象时需传入向@BotFather申请的token。
通过以下代码可以设置代理:
1
2
|
from telebot import apihelper
apihelper.proxy = {'http': 'http://127.0.0.1:108', 'https': 'http://127.0.0.1:108'}
|
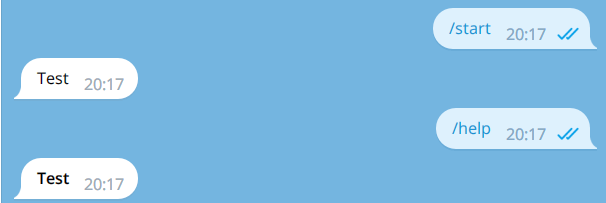
以下代码定义了机器人的/start和/help命令:
 1
 2
 3
 4
 5
 6
 7
 8
 9
10
11
12
13
|
import telebot

bot = telebot.TeleBot("YOUR_BOT_TOKEN")

@bot.message_handler(commands=['start'])
def send_welcome(message):
	bot.send_message(message.chat.id, "Test")

@bot.message_handler(commands=['help'])
def send_help(message):
	bot.send_message(message.chat.id, "<b>Test</b>", parse_mode = "HTML")

bot.infinity_polling()
|
send_message函数传入的第一个参数是当前对话的id,第二个参数是发送消息的内容。通过parse_mode可以设置消息内容的格式。
上述代码的运行效果如下:
编辑消息的函数为edit_message_text,使用实例如下:
1
|
bot.edit_message_text('Edited', chat_id = message.chat.id, message_id = message.message_id)
|
第一个参数是消息的内容,第二个参数是对话的id,第三个参数是消息的id。若消息的内容与编辑之前相同,则会报错。
通过register_next_step_handler函数可以定义下一步的操作的函数,同时可以向函数传递参数:
 1
 2
 3
 4
 5
 6
 7
 8
 9
10
11
12
13
|
import telebot

bot = telebot.TeleBot("YOUR_BOT_TOKEN")

def test_next(message, test1: str, test2: str):
    bot.send_message(message.chat.id, f'{test1}+{test2}')

@bot.message_handler(commands=['test'])
def test(message):
    msg = bot.send_message(message.chat.id, "Test")
    bot.register_next_step_handler(msg, test_next, 'test1', 'test2')

bot.infinity_polling()
|
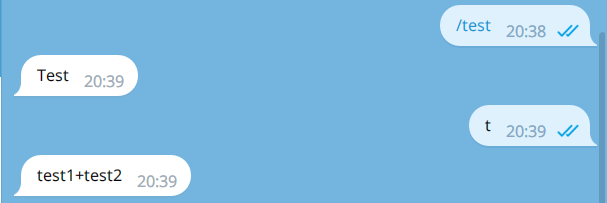
下一步操作将会在接收到用户输入后进行触发。
上述代码的运行效果如下:
Telegram的消息按键有两种:ReplyKeyboard和InlineKeyboard
 1
 2
 3
 4
 5
 6
 7
 8
 9
10
11
12
13
14
15
16
|
import telebot
from telebot.types import ReplyKeyboardMarkup

bot = telebot.TeleBot("YOUR_BOT_TOKEN")

def test_next(message, test1: str, test2: str):
    bot.send_message(message.chat.id, f'{test1}+{test2}', reply_markup = ReplyKeyboardRemove())

@bot.message_handler(commands=['test'])
def test(message):
    markup = ReplyKeyboardMarkup(resize_keyboard = True)
    markup.add('test1', 'test2')
    msg = bot.send_message(message.chat.id, "Test", reply_markup = markup)
    bot.register_next_step_handler(msg, test_next, 'test1', 'test2')

bot.infinity_polling()
|
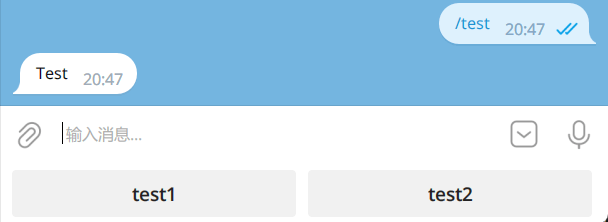
在ReplyKeyboardMarkup初始化时将resize_keyboard设为True,则按键会自动调节到合适的高度。
当输入/test,机器人的运行结果为:
若将reply_markup的值设为ReplyKeyboardRemove,按键会在发送该消息后消失,否则按键不会消失。
运行效果为:
InlineKeyboard是在消息的下方带有按键,且可定义按键的类型,常用的按键类型为:
- callback_data:按下按键则调用回调函数
- url:按下按键则打开链接
pyTelegramBotAPI提供了quick_markup函数来帮助创建InlineKeyboardMarkup。
 1
 2
 3
 4
 5
 6
 7
 8
 9
10
11
12
13
14
15
16
17
18
|
import telebot
from telebot.util import quick_markup

bot = telebot.TeleBot("YOUR_BOT_TOKEN")

@bot.message_handler(commands=['test'])
def test(message):
    button = {"test1": {"callback_data": "test"},
            "test2": {"url": "google.com"}}
    bot.send_message(message.chat.id, "Test", reply_markup = quick_markup(button, row_width = 2))

@bot.callback_query_handler(func=lambda call: True)
def refresh(call):
    if (call.data == "test"):
        bot.send_message(call.message.chat.id, "Test Callback")
        bot.answer_callback_query(call.id)

bot.infinity_polling()
|
quick_markup的row_width参数定义了同一行的最大按钮数量。
上述代码定义的InlineKeyboard样式为:
通过@bot.callback_query_handler函数修饰符对callback_data处理,call.data对应callback_data。再按下按键后,按键上会出现进度标志,通过调用answer_callback_query可以消去进度标志。
上述代码,按下test1按钮后,结果为:
Telegram消息主要的文件类型为:animation、audio、document、photo、sticker、video、video_note、voice,这些文件类型都有对应的file_id,通过id可以获取文件的下载链接。
获取id:
1
|
file_id = message.document.file_id
|
获取下载链接:
1
|
download_url = bot.get_file_url(file_id)
|
若收到的消息不是此种文件类型,则message.<type>返回None
在这些文件类型中,photo类型有所不同,其返回值是一个数组,数组的每个元素对应不同的分辨率。
这篇文章中记录的是pyTelegramBotAPI的基本用法,也是我在项目mypybot中用到的主要API内容。


